Thursday, February 25, 2010

My 1st Trial...Train Cake 101

My son is a HUGE train fan...HUGE! So, I thought I would try my hand at creating a train cake for his birthday. I figured since I am not a cake decorator, I would try it prior to the actual day to see what I could come up with.

I usually don't use a box mix, but when I told my hubbie my aspirations, he came home with a few boxes of cake mix and some frosting. So, I thought...why not!

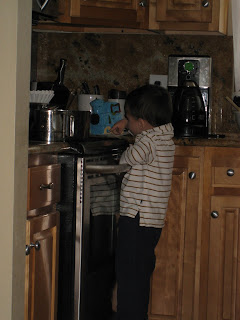
First, I let AJ do some mixing. I think he did some tasing too behind my back!
No tasting though once the eggs are added. And, yes, I know I should have lightly beaten the eggs first, but my taste tester would not have waited.

Then, I let him pour the batter into the pans.

It took a bit of trial and error in baking times because of the size of the pans.

AJ enjoyed the cooked version as well!

Then, I sliced the tops off to make nice rectangles.

Then, I put on the crumb frosting. This will allow me to put the colored frosting on without all the little crumbly parts.

Then, I used two of the mini muffins to make the smokestack. I also gave them a crumb coating.

 Then, I mixed some blue coloring to the frosting and started to decorate. I didn't really decorate with much other than frosting. I just wanted to see if I could make the shape! It turned out pretty good!
AJ definitely enjoyed it.
Guilty as charged! How can you get mad at that face!

Recipe update

I have been in a real funk with cooking lately and usual I am behind on my meal plan menu! So, I thought I would link you over to a few of the recipes I am going to be making the rest of this week and next week.

I am going to make a homemade bolgnese tonight. I saved this one because I am taping to cooking process to teach my students about the different methods of heat transfer.

On Saturday, I am making Jambalya (the non- Creole style). This is a really simple recipe I love. I make a bunch of rice and mix in a can (or two) of Petite Dices Tomoatoes. Then, I cook up some sliced Italian Sausage and chopped boneless chicken breast. Then, I throw in a can of green chilies (sometime some adobo sauce) and a few dashes of hot sauce. Warm it all up in a nice pan and serve with a beautiful salad and warm bread. There are always leftovers for lunch the next day! Simple and delish!

On Sunday, it will be my mom's last day in ton before flying home, so I have to make Beef Stew. (a true creature comfort) I found a new recipe I can't wait to try!

Tuesday is Frito Pie. I will post that simple recipe as soon as I get my computer back. It decided to crash!


Another outstanding recipe I found recently I had to squeeze in this week was this Lentils and Chicken recipe. I can't wait for Wednesday! It looks dashing, plus I still have some Amish Lentils leftovers. I am super excited!

Friday  we will finish out the week with a Pinto Bean soup...have I said we are big on beans? This is a simple recipe. Soak beans overnight (or just use the cans) and boil beans with some ham (I will use the ham bone I have been saving). Boil in 3 cups of water until beans are soft. Then, add 1 cup drained sauerkraut and 1/2 cup uncooked rice. Boil until rice is soft.  Now,make a roux from bacon fat and flour. Add to the soup slowly. Serve with cornbread.

Thursday, February 18, 2010

Chicken Souvlaki Dinner Recipe

I was really exicted to make this dinner because I have wanted to make homemade pita for quite a while. I was hoping it wouldn't be too much work because I didn't start the whole process of making this dinner until 4:00pm and we usually eat at 5ish. So, I started with the pita recipe which I found at Cate's World Kitchen

Here is the recipe:
Pita
2 cups bread flour
1 cup whole wheat flour
1 1/2 teaspoons salt
1/2 tsp sugar
2 1/4 tsp active dry yeast
1 1/4 cups warm water (NOT HOT)
2 tablespoons olive oil
 
1. Combine the yeast, 1/4 c water and sugar. Allow to sit for a few minutes until it starts to foam. (Now if it is not a hot day, then start your dryer...just trust me...start the dryer)
2. Add in the remaining ingredients and start to mix. You can do this easily in a standup mixer or you can do it on your own by turning it onto a lightly floured surface and kneading for 10 minutes. Now, put it in a hot place to rise. I put it in the dryer and it rises in like 20 minutes. Just make sure it is nice and hot! (Start Marinating the chicken...check Souvlaki recipe)
3. Once it has doubled in size, fold it over on itself a few times and then cut the ball into 8 pieces. Cover with a damp towel and let sit for 20 minutes. (Again, I shoved in my hot dryer for maybe 10 minutes...they puffed up a bit). Don't forget to turn the over on to 450 degrees. ( Make the tzatziki and start cooking hicken)
4. Roll each ball to 1.8" thick...if you leave it thicker you will have really thick pita. Trust me...1/8" thick! Then, place 2-3 at a time on a cookie sheet and bake in oven for 2-3minutes before flipping. Bake 1-2 minutes on the other side. Repeat until all are baked and then serve.
 
 
3-4 breasts of chicken, sliced thin or chunked
2 cloves, minced garlic
Juice of 1 lemon
1 1/2 T greek yogurt (you can use reg. yogurt if you prefer)
1/4 c olive oil
Salt and Pepper
Pinch of Mint and Oregano
 
Mix everything together and marinate for as long as possible ( I did it for like 20-30 minutes and it was perfect).
 
It is best on kebob sticks and grilled, but since we are out of propane and time is short. I cooked it in a griddle pan.
 
1 small container of plain greek yogurt or about 1/2 c plain yogurt
1/2 cucumber (peeled, deseeded, grated, & squeezed dry)
2 cloves Garlic (yep 2 more cloves..gotta love garlic)
1T lemon (less is more here or your Tzatziki will be runny)
Optional: Add a dash of dill or mint if you have or a shot of Ouzo ( I know...who has that right...yeah, we have like 3 bottles thanks to our Greek customers, so I opted for the Ouzo)
The customary Salt and Pepper
 
Throw it all together and let the tastes meld together in the fridge until you ae ready to serve. Best served cold!
 
 
How do you throw this all together...I serve a plate of pita, a plate of chicken and the Tzatziki. Oh and I had a plate of fixings on the side...you know some lettuce, nice ripe sliced tomato, onion. Make yourself and voila!
 
This wasn't that bad. I managed to get it on the tabel by 5:30 btween cooking, ranging my 2yo and answering work calls. If I can do it, so can you...and it is OH SO worth the work!


An Easy, Yummy Summer Treat

Ok. So, it is winter and cold outside...not so much summer! But, when you have a really picky toddler that seems to avoid dairy at all costs...along with almost everything else...you tend to get a bit desperate. AJ loves ice cream (ag-ga as he calls it). So, why not make com yogurt pops. I have been thinking about juicing some fruit for some fresh fruit pops ever since be bought our juicer, but they do not carry popsicle containers at the grocery store. I never seem to remember to look for them while I am out. Plus, all the popsicle containers make these huge popsicles...way more than AJ can handle. So, the thought finally hit me! Make yogurt pops in the funky shaped ice cube trays from IKEA. (I need to make another trip to get some more!)

So, AJ helped me put some different flavored yogurt together in the trays and we froze them. He LOVES them! He will eat 2-3 at a time! Total success! He loves the mixed ones. We made...vanilla/banana, strawberry/banana, and blueberry/vanilla. Easy Peasey!

(Oh and when Ican't get AJ to eat a whole popsicle, I decided to make some yogurt melts also. I put little nickle sized dots of yogurt on a platic cutting board and froze it. He loves those also and it makes a fun alternative to a whole popsicle)

The Newest Addition to Our Appliance Family

TaDa! I am so excited! This is my Nana's waffle maker which she received as a Christmas present in 1972! 1972! It is an oldie but goodie! Since AJ is such a huge waffle fan I was super excited when I came across this! It was in perfect condition and even still had the instruction manual. Can you believe that! The only thing I found was it needed to be re-greased to seal the non-stick surface, but since that tiny fix it is working perfectly.Even with that being said, it doesn't mean there isn't a learning curve associated with waffle maker.

Lesson #1: No matter how excited you are to use your new waffle makers, hold back from rushing it! When you know it is not hot enough, don't do what I did and add the waffle batter anyway...the results will not be what you desire!
AJ sampled it! Not perfect, but tastes great!

Lesson #2: No matter how hungry you are...resist the urge to peek! You will just pull your waffle apart right down the center...and although said it doesn't affect the taste wait for the perfect waffle.

Lesson #3: Once you have a clear understanding of the heat settings and cook time, waffle to your hearts content! Just make sure you have room in the freezer! Or, just scarf them down the moment they come off, like we did! Who cares...no one is watching!


My attempt at heart shaped waffles for V-day fun!

Monday, February 8, 2010

In my search for Homemade...Cheese Itz!

 
I am really working on more homemade copycat type recipes. Things I feel good about feeding my toddler...I am also going to try to take more pictures of the steps to help with the cooking/baking process. I can't say I will do this for all postings because it is very time consuming. Between working, taking care of a 2 y.o. and managing our other photo heavy blog, this one doesn't get much attention in the photo department. Ironically though, I only like reading cooking blogs with photos...anywho! I had planned to always post pics, but I was not please with how the photos were turning out so I quit! I will try to post more pics, at least a finished product pic.  That being said...I confess now, I am not a professional photographer and although I have Photoshop I have not figured out how to use it...so here is my best attempt! Enjoy!  


My Homemade Cheese Itz!
1/4 c oats, ground or Oat Bran
1/4 c flour
2T butter, cut into pieces
1/3 bag cheese, any type your prefer
 pinch of salt
pinch of sugar
2T water

***Note: I had a ton of left over sliced Swiss cheese, so, I finely sliced it so it was similar to grated cheese.
 

I used oat bran, but you can use plain old fashion oats. Just put 1/4 whole oats in the food processor and process until ground. Then, add four, butter, cheese, salt and sugar to food processor.
  
Process until combined, then roll together in a ball on a piece of plastic wrap.
  
Wrap in plastic wrap and chill for 20 minutes.
  
Heat oven to 350 degrees. Then, roll out dough to 1/4" thickness and cut out any shape you would like. I made little stars, circles and rectangles. Then, place cutouts into a greased cookie sheet. Bake for about 10 minutes (less if rolled thinner). 
  
Remove and allow to cool. Keep in a airtight container for a few days! Enjoy...Simple and Homemade! 
 

February Meal Calendar

I planned in more leftovers this month because I know we will go out to dinner at least once this month. Plus, I over planned last month's menu plan, so, we iwll see how we do this month. I will work to add the recipes as we go through the month. If there is a specific recipe you would like, just let me know and I will get it posted ASAP! Bon Appetit!

Tuesday, February 2, 2010

Croatian Cooking Contest

I am just finishing up the January meal calendar and it hit me today that it is the 2nd of February already. So, I started planning my meal plan for this month. I needed to get it out ASAP. As I was looking around for recipes, I found this!

4th cooking event mediterranean food - CROATIA - tobias cooks! - 10.01.2010-10.02.2010

To say I was ecstatic was a vast understatement. I immediately showed my husband, he told me I should enter my Sarma (stuffed cabbage) recipe. For those of you that don't know, My husbands family is from Croatia. We raise our son in a bilingual home steeped in Croatian cuisine. I love Croatian cuisine!


So, I thought if I was going to enter, the least I could do is post the recipe for you as well. It is a bit challenging the first few times if you have not made stuffed cabbage before, but after a few times you will get the hang of it. This recipe is my husband's mom's recipe. I have included as many tips as I could to help you learn how to make this dish. Many of my tips have come after lots of trial and error. But, please do not let this recipe scare you. It is a time consuming, but oh so delicious! Par it with a nice crusty bread and a side of mashed potatoes and you will magically be transported over the Adriatic sea to the heart of Zagreb!


Sarma (Stuffed Cabbage)

1 medium head of cabbage
2t salt
1t oil
1 small onion minced
2 cloves garlic minced
1/2 lb ground pork
1/2 lb ground beef
1/2 lb ground veal
1 cup rice (not the instant type)
1T paprika
1T vegeta
Salt and Pepper
2 bags Sauerkraut
1 can tomato soup
2T oil
2T flour
water

1. Start a large pot of water boiling. The pot must be large enough to fit an entire head of cabbage. While the water is warming up, cut the core out of the head of cabbage and add about 2 t of salt to the hole where you removed the core. Once the water is boiling, add the cabbage carefully so as not to burn yourself. Boil a medium head of cabbage for about 8 minutes. I usually peel the top few leaves off as it cooks.

*Tip: Once the cabbage has boiled, carefully remove (without burning your fingers)the outer most leaves. They should come off very carefully without shredding. Put these removed leaves in cool water. SAVE the hot water for the inner most leaves which will still be tough.

2. Saute the minced onion and garlic in a bit of oil. Cook simply until translucent, do not brown!

3. Mix your meats. (I have used a veal/pork/beef combo and other times I only use pork and beef. Both are really good!) This is the part where you are going to get dirty! Combine the meat, garlic and onions, rice, paprika, salt and pepper, vegeta, and 2 nice hand fulls of sauerkraut. Let it squish between your fingers!

*Tip: Always use the bagged sauerkraut, NOT the stuff in the can! Also, when you put the sauerkraut in the meat do NOT rinse it. You do not need to add any extra juice, just the sauerkraut.

4. Now stuff! Take a small handful of meat and place it at the top 1/3rd of the leaf. Fold over the top of the cabbage to cover the meat and then tuck in the sides (like when wrapping a present). Continue to roll it down until all of the leaf is rolled. Repeat this process with all the leaves and meat.

*Tip: If you hit the inner leaves and are having difficult rolling them you can do one of two things. 1. Put those leaves back in the hot water you orig. boiled the cabbage in. Or, 2. Stick it in the micro for 10 second batches until soft enough to roll.

5. Prepare the pot. In a large stock pot, make a roux by adding 2T oil and 2T flour. Mix and cook until four turns a light golden brown. Watch carefully so you do not burn the flour. (If you do carefully dump out and start again. Once brown, add 1 can of tomato soup, 1/2 a bag of sauerkraut, (You want to drain this bag of sauerkraut. Do NOT rinse just simply drain!) and a few cans of water. Next, start layering in the cabbage rolls. Do a layer of cabbage and then a layer sauerkraut until all are gone. Then, add enough water to submerge the cabbage rolls. Cover and cook on a slow simmer for 2 hours.

*Tip: RESIST the urge to stir! Instead carefully shake the pot every once in a while. Taste the soup, if too salty, add a bit more water. If bland, add more vegeta.

Serve with mashed potatoes and warm crusty bread. It's even better the next day when the seasonings have had a chance to meld together!


Dobar Tek!